 bone-broth-recipe-for-dogs[/caption]
Bone Broth for Dogs
Bone broth is a simple way to add some extra nutrients to your dog’s diet, either as a daily supplement or to provide an extra boost to those recovering from illness or surgery. Chock full of health promoting ingredients, here’s my recipe for bone broth that your canine friends are sure to love….
Ingredients (as a general rule use an 80/20 ratio of meat to vegetables):
- Raw kangaroo tail (see my alternatives below if roo tail is not readily available)
- Kale Oregano Parsley Zucchini Yellow squash
- Apple cider vinegar or lemon juice (Acidity helps to draw nutrients from the bones)
Method:
- Place ingredients in a crockpot, cover with water and add 2 tablespoons of apple cider vinegar or lemon juice.
- Simmer ingredients gently for 20-24 hours.
- Allow to cool. Remove all bones from the broth using a strainer if necessary (do not feed these bones to your dog).
- Pour into single-serving size storage containers and freeze. Defrost and serve as required.
If you feed a natural diet such as Vet’s All Natural Raw 76, Complete Mix or Health Roll, bone broth can serve as the perfect complementary supplement to bolster your dog’s immune system and promote good joint and gut health.
You can add bone broth to your dog’s existing food or serve separately in addition to their regular meal but just
remember the broth alone is not nutritionally complete and shouldn’t be used for long-term exclusive feeding.
How To Make Bone Broth For Your Dog

One of the most common questions we get here at Dogs Naturally is how to make bone broth.
Bone broth is a pot full of delicious and nutritious minerals and nutrients that dogs love … and I love that so many of you are starting to make this super-easy, super-nutritious treat.
And speaking of love, when you take the time to make your own bone broth at home for your dog, they’ll know you’ve gone the extra mile to give them sparking good health!
Why would you want to make bone broth for your dog?
- It helps maintain a healthy gut, especially for dogs with digestive issues
- It supports your dog’s immune system and detoxes his liver
- It helps protect his joints
- It’s full of minerals, including calcium, silicon, sulphur, magnesium and phosphorus
(Related: Bone Broth For Dogs? Here’s Why It’s A Great Idea!)
But best of all, bone broth is super easy to make!
So now that we know why you should make bone broth for your dog, you’re ready to start cooking, I’m going to give you a step-by-step guide to how I make bone broth for my crew so you’ll know how to make bone broth for your own dog.
Step 1: Add Bones, Water And Vinegar
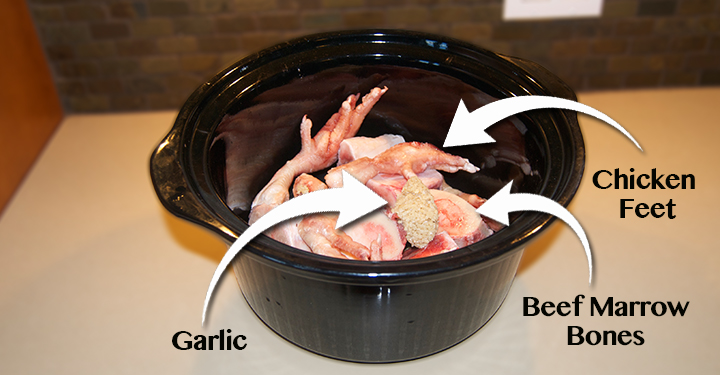
First, I fill my crockpot with bones. Because I like to make sure there’s lots of healthy, joint protecting gelatin in my broth, I use bones with a lot of joints in them like chicken feet. I’ll also add some garlic for health and flavor (and if you think garlic is dangerous for dogs, just leave it out or read this article).
If you don’t have a crockpot, you can use a regular old pot on your stove … but you have to leave it cooking overnight so I prefer the crockpot.
Organic, grass fed bones will be the best … don’t skimp on the bones and feel free to use discarded bones from your own meals … they’re just fine for broth.
Step 2: Add Water And Vinegar
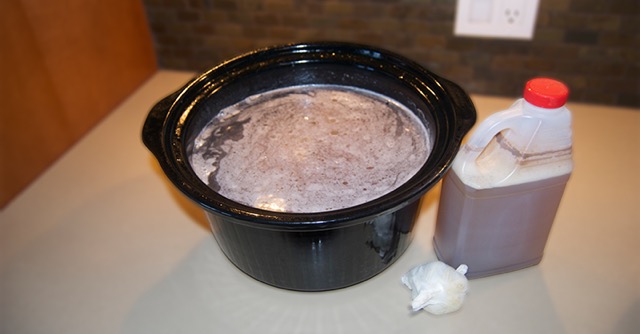
Next, I’ll fill the pot so the bones are completely covered, plus an extra two or three inches of water on top.
The important part is to add raw apple cider vinegar or lemon juice to the pot … this is the magic ingredient that makes sure your broth has all of that great and healthy gelatin in it … it also pulls the nutritious minerals out of the bones.
I’ll add about three or four tablespoons of vinegar to a pot this size.
Once I’ve added the bones, water and vinegar, I put my crockpot on high for an hour, then I turn it down to low and leave it cooking for 24 hours. You can leave it cooking for two or three days if you want, but I find it starts cooking down too much after a day and I can still get a good jelly-like consistency after a day.
(NOTE: Get our Free Raw Feeding Videos and start your dog on the path to ultimate health today!)
Step 3: Strain The Bones
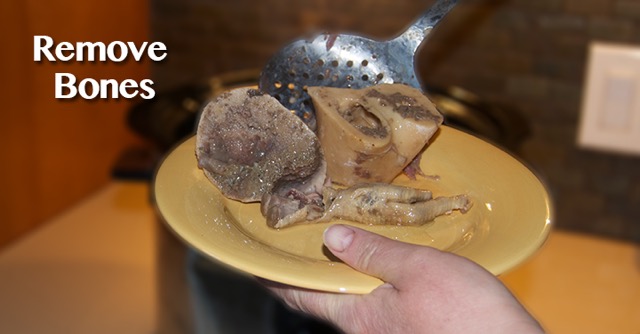
When the broth is finished, I need to strain the bones and meat out. These bones shouldn’t be fed to dogs, so I put them in the green bin. My dogs don’t need them anyway … I’ve already got the good parts in my broth.
Step 4: Get Creative
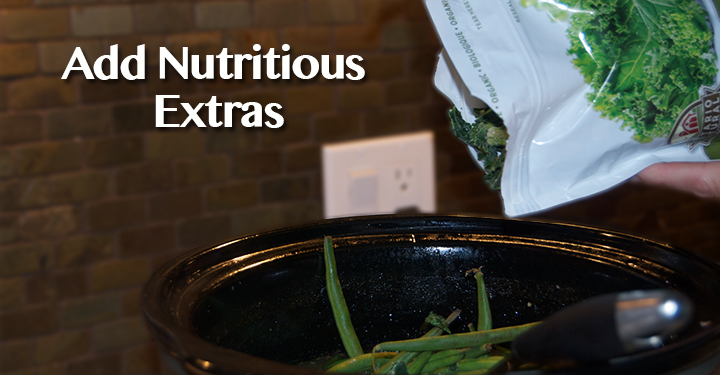
Here’s the fun but optional part.
When I turn the crockpot off, I’ll add some nutritious extras. For this batch of broth, I added some frozen kale and fresh leftover green beans. But I also like to add medicinal mushrooms, broccoli, kelp and herbs … and sometimes nothing at all. Check out this article for some ideas of nutritious veggies you can add.
Toss in any healthy herbs or vegetables your dog loves (and if he doesn’t love them, then bone broth is a great place to hide them).
I’ll add these ingredients while the broth is hot, right after I’ve turned it off. Then the broth will cool with the veggies in it, making them just soft enough for my dogs to get their yummy goodness.
Step 5: Let It Cool

Once my broth is cooled, I’ll put it in the fridge. This is where the magic happens … and in just a few hours, you’ll know if you’ve made a good batch!
Once your broth comes out of the fridge, it will have a hard layer of fat on top. You should chip this off and toss it in the green bin.
Underneath the fat, your bone broth should now look like jelly … the jelly means you’ve got lots of gelatin in there, and that’s what helps with your dog’s joints and the leaky gut that can cause allergies and digestive upset. That gelatin plugs the holes in leaky gut that can cause allergy symptoms, so the more jelly-like, the better!
If your broth doesn’t look like jelly, don’t worry … it just means you didn’t add enough vinegar. Next time just add a little more vinegar and your next batch will be just fine. But first use the broth you have because it will still be packed with healthy goodness!
Step 6: Store Your Broth
Because I have a lot of dogs, I just leave my bone broth in the crockpot in their fridge (yes, my dogs have their own fridge, but I’m sure there’s room in your fridge for bone broth). A pot this large will last my five large Labradors about 4 or 5 days. I wouldn’t want to keep it in the fridge for more than a few days anyway so I just make a fresh batch once or twice a week.
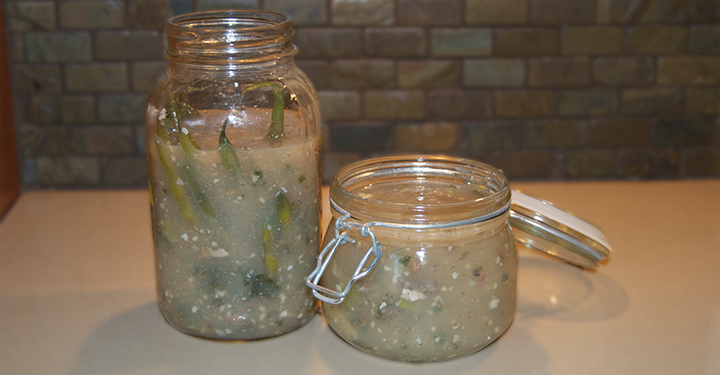
If you have just one or two dogs, you can take the broth and label it into mason jars and store it. If you’ve got small dogs, you can ladle your broth into an ice cube tray and just pull a cube out at a time.
Having a supply of bone broth in your freezer is a super idea … bone broth is incredibly nutritious and healing for sick dogs (think chicken soup). So make sure you have some on hand for emergencies.
Step 7: Give It To Your Dog!

The final (and best) step is to feed the bone broth to your dog!
I pull bone broth out of the fridge and give my large dogs two or three heaping spoonfuls over their dinner. It’s food not medicine, so I don’t get too hung up on exactly how much I give my dogs.
My dogs love hanging out in the kitchen when it’s cooking … and you can see above that Dottie can’t wait to sample it after smelling it all day!
So there you have it … it’s incredibly easy to make bone broth and your dogs will love the taste and reap the health benefits.
So what are you waiting for? Get cooking!
No comments:
Post a Comment